


Flaky Keto Puff Pastry.. can we all just take a moment to breathe this in.
When I started a keto diet, I never thought I'd be eating pastries again. But believe it or not, here we are.
I've not only developed an insanely good flaky keto puff pastry using “Vital Wheat Gluten” as the main ingredient…I've also created a delicious 100% gluten free keto puff pastry. This way you can choose which version best suits you lifestyle.
** I now sell a Keto Bread and Pastry Flour that does not use almond or coconut flour and makes perfect keto pastry every time among many other bread and dessert items! It’s a substitute for white flour. You can find more details on the product page.**
If you haven't heard of vital wheat gluten, I've written an entire article on it here.
But in summary, it is the protein found in wheat. It’s what creates gluten strands and provides the soft but chewy texture in bread and baked goods. Nowadays you can buy Vital wheat gluten extracted and separated from the wheat. On its own, it’s only a protein with minimal carbs attached to it. It's perfectly okay on a keto diet as long as you are not gluten intolerant or celiac. If you are, then the gluten free version of this pastry dough will also work great!
This pastry dough is one of the best things I've ever had the pleasure of developing and working with.
It's just so versatile. There's endless recipes you can make with it.
It puffs up like regular puff pastry and has beautiful buttery layers throughout.
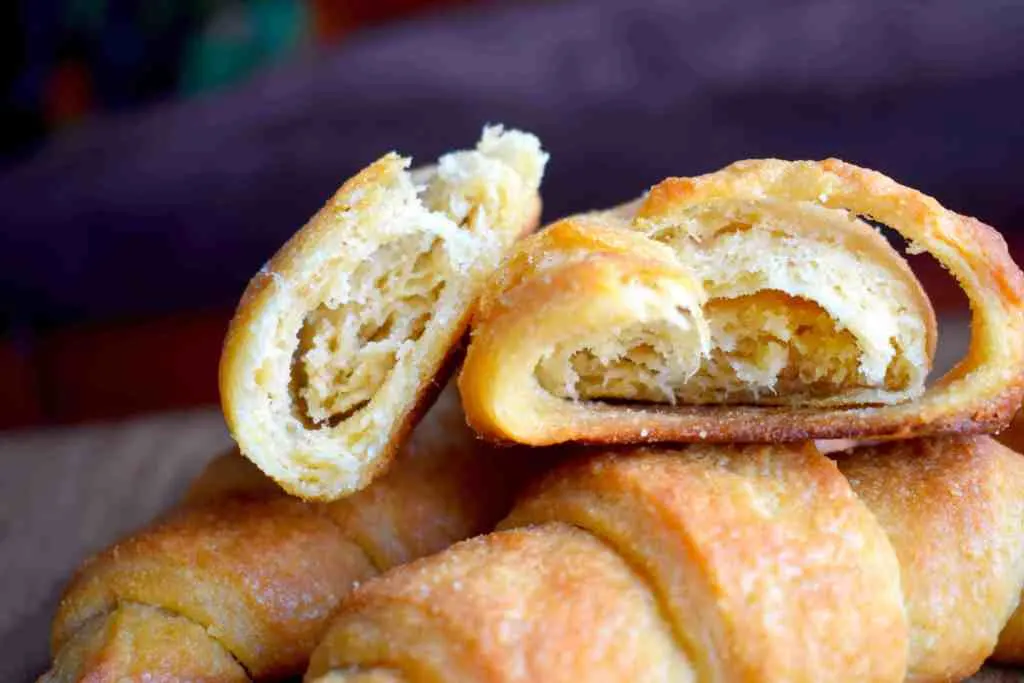
So far I've made keto croissants, goat cheese and caramelized onion tartlets and cheesy bread but there's definitely more ideas to come..
I challenge you to get creative with this recipe and share what you come up with! Tag me in your creations on instagram: @sammysamgirl
*Note when looking at the photos I've marked which is made with vital wheat gluten and which is gluten free so you can see the difference. In all honesty they are both really delicious taste-wise but I might slightly prefer the vital wheat gluten version as the flaky layers are more noticeable.


Vital Wheat Gluten Puff Pastry
Tools I Used To Create Flaky Keto Puff Pastry
- Low Carb Substitution Guide – This is totally optional but if you like my recipes, I now have a $5 guide available with all of the substitutions I use to create every recipe on my site. You can use this to convert old traditional recipes and create new keto recipes! You can purchase it here and/or read more if you are interested. 🙂 I appreciate your support so much guys!
- Nutritional Food Scale – AKA my best friend. This little buddy has been with me for over 4 years and never fails. Perfect measurements and only needs the batteries replaced maybe once a year!
- Non-Stick Rolling Pin – I didn’t use this one originally for the recipe but I highly recommend it so you don’t have to constantly flour your surface and roll the dough out with wax or parchment paper!
- Wax/Parchment Paper – Makes it easier to roll out dough that’s sticking to your rolling pin.
- Saran Wrap – To wrap the dough for chilling

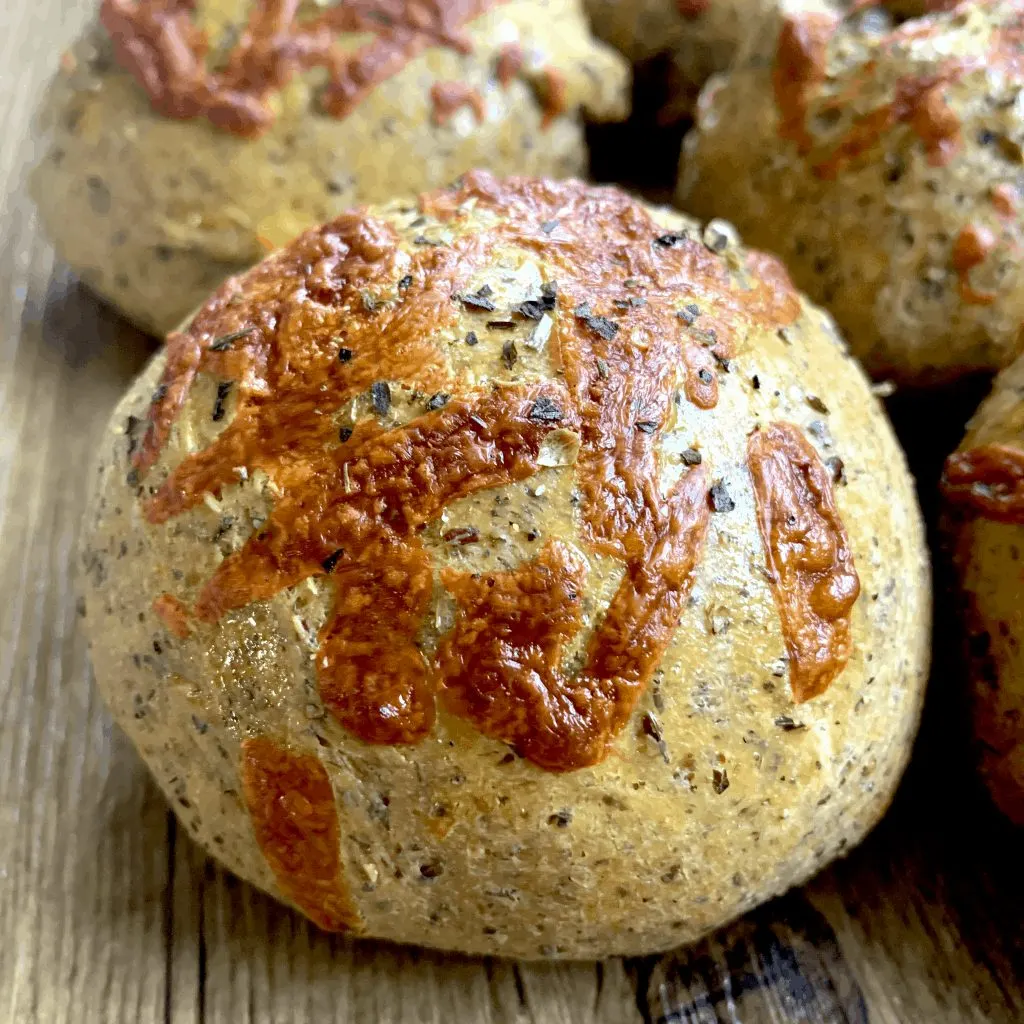
Vital Wheat Gluten Puff Pastry with Cheese
Tips For Making Flaky Keto Puff Pastry
- When making the gluten free version, you'll notice the dough will want to fall apart in chunks at first. This is why the dough must be kneaded a few times. Once you do so, the dough will come together nicely and will roll out much better! Just be sure not to melt or blend in all of your butter when kneading it.
- When making the Vital Wheat Gluten version DON’T OVER-MIX. You want it just blended enough so you can form a rough ball and place it in the fridge. The dough doesn’t have to be perfect right away because you’ll be rolling it out several times and the butter will eventually become less “chunky” in the dough.
- Your dough should seem a little dry at first but once you get rolling it, the butter chunks should moisten it more. If you find your dough still very dry, you can sprinkle a bit of cold water on it as needed to add moisture OR alternatively if you find it too wet, sprinkle coconut flour as you are rolling and folding it.
- If your dough, gluten free or with vital wheat gluten rolls out messy and looks rough at first, that's completely fine, sprinkle flour as needed and continue to follow the folding instructions. It will start to smooth out more after each layer. You can also push in rough edges slightly before rolling to help it come together.T
- The gluten free pastry will brown more in the oven then typical pastry but that's okay! It will still be delicious. It's just the colour of the psyllium husk added. But I do recommend checking it before the regular pastry as it tends to bake a little faster.
Ingredients In Flaky Low Carb Puff Pastry
- Vital Wheat Gluten – See this article if you’d like to learn more about it and why I love it in my low carb breads and pastries. (Not in the gluten free version)
- Oat Fiber – This ingredient provides structure to the dough without adding carbs as it’s almost 99% fibre. (Not in the gluten free version)
- Xanthan gum – a great way to improve elasticity in gluten-free baked goods. It’s used alongside vital wheat gluten to provide the best possible “crust-like” texture. If you do not have this ingredient you can still go ahead with this recipe but I’d recommend it if you can get your hands on it.
- Almond & Coconut Flour – I use the Kirkland Costco brand of almond flour (I buy it in bulk on Amazon or at Costco itself occasionally) and this brand of coconut flour for this recipe. As I’ve noted in many of my past recipes, the brand of almond and coconut flour can affect the final outcome of the recipe because absorbency can vary depending on how the flour has been processed.
- Psyllium Husks – This is used in the gluten free pastry to replace vital wheat gluten. It acts similar as it helps the dough to create gluten-like strands. (Not in the vital wheat gluten version)


Gluten Free Keto Puff Pastry
Can I Freeze Keto Flaky Puff Pastry Dough?
- Yes! You can freeze this dough by wrapping it in Saran Wrap and placing it in a ziplock bag after it's been rolled out and folded (at the end of step 8).
- You can also refrigerate it if you are using it in the next 3 days!
- Lastly, you can form your pie crust, tartlets or pizza crust and freeze it that way as well, just be sure to wrap and store it properly.

Flaky Vital Wheat Gluten Puff Pastry
Here are some recipes you can try using this puff pastry:
- The Best Keto Croissants
- Keto Sausage and Egg Breakfast Pockets
- Strawberry and Cream Cheese Pastry Rolls
- Chocolate Cream Cheese Pastry Braid
- Keto Tuna Melts With Puff Pastry
- Keto Puff Pastry Ham & Cheese Sandwiches
- Keto Cinnamon Rolls Made With Puff Pastry
- Keto Goat Cheese Tartlets
- Keto Strawberry Pop Tarts
- The Best Keto Cheesy Bread
*New* Get Your Customized Keto Diet Plan For 1$
Vital Wheat Gluten Flaky Keto Puff Pastry
Ingredients:
- 5 tbsp vital wheat gluten, 50g (see above in the post for more info!)
- 1/4 cup almond flour, 30g
- 2 tbsp oat fiber, 14g
- 1 tbsp coconut flour, 7g
- 1/4 tsp baking powder
- 1/4 tsp xanthan gum, optional, recommended for texture
- 1/8 tsp salt (1/4 tsp if using unsalted butter)
- 125g salted butter, cold
- 1/3 cup + 1 tbsp cold water

Gluten Free Keto Puff Pastry
Gluten Free Keto Flaky Puff Pastry
Ingredients:
- 5 tbsp whole psyllium husks, 26g (You can also use ground just be sure to match the amount in grams as you'll likely need less tablespoons)
- 1/4 cup almond flour, 30g
- 1 tbsp coconut flour, 7g
- 1/4 tsp baking powder
- 1 tsp xanthan gum
- 1/8 tsp salt
- 125g butter cold
- 1/2 cup cold water
- 1 egg white
Directions:
- Add your dry ingredients to a food processor and grind until everything is a fine powder (if you do not have a food processor you can definitely still make this recipe, your dough may just be a bit more textured)
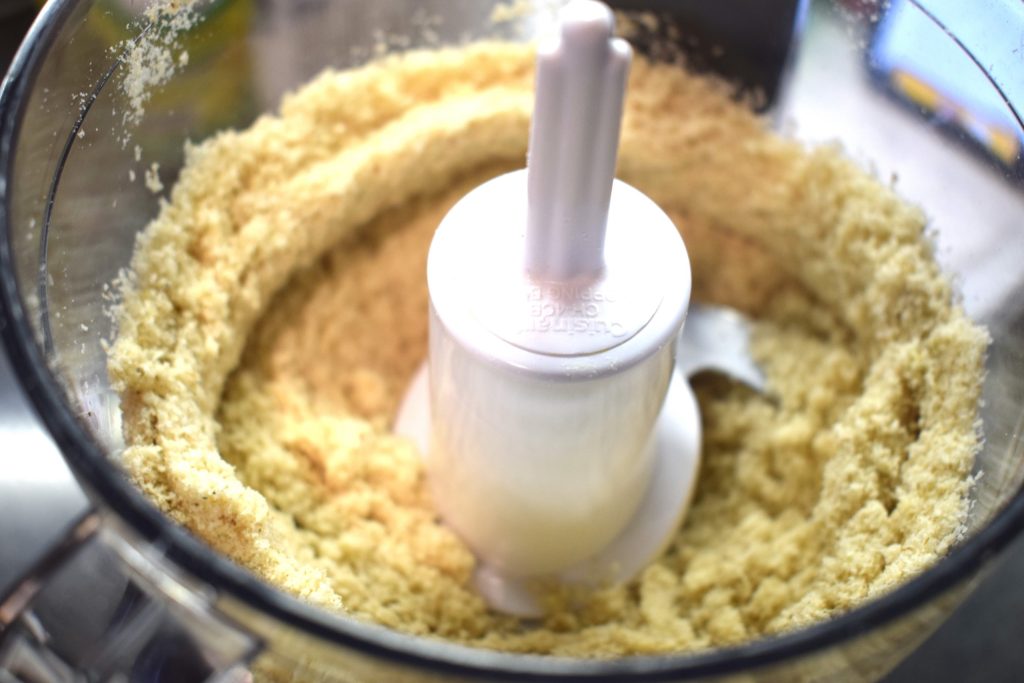
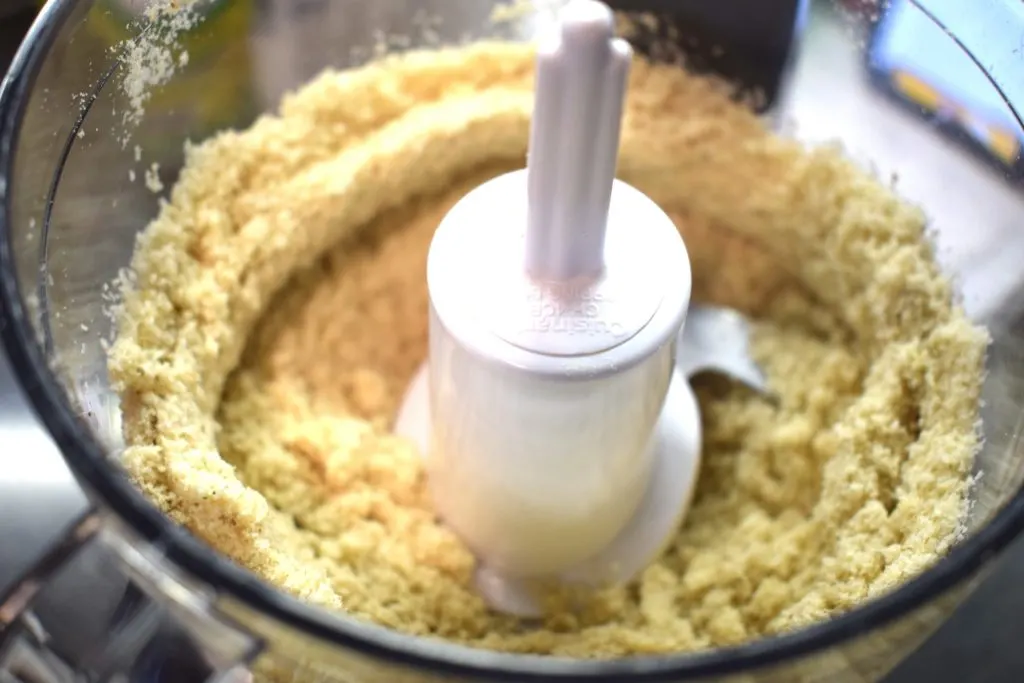

- Next add in chunks of butter (roughly chopped, doesn't have to perfect) and pulse a few times until the butter chunks are a bit smaller and coated with flour but still visible. (again doesn't have to be perfect, if you don't have a food processor, just chop the chunks ~1/8th of an inch thick and and stir them into your dry ingredients).
- Dump this mixture into a bowl and add your cold water (and egg white if making the gluten free version). Mix with a spoon until a rough dough forms.


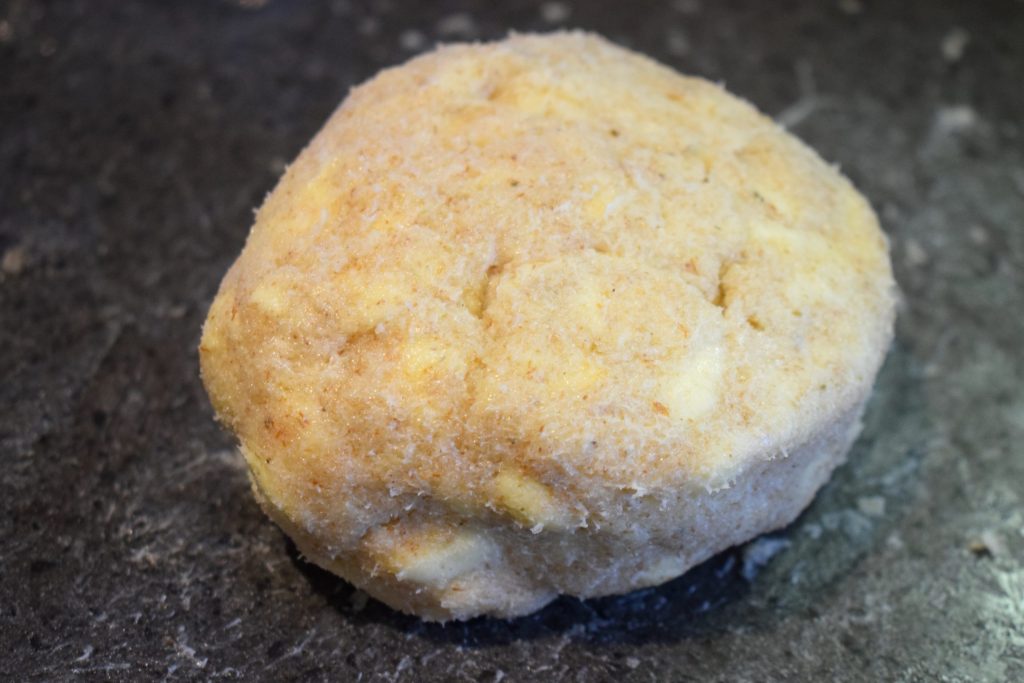
- *Skip this step if making the vital wheat gluten version – press the dough together and knead it a few times until it starts to stick together (you don't want the butter chunks blended in but you also want the dough to hold together without crumbling and have a smoother surface.
- Press the dough into a rough ball shape, wrap it in Saran Wrap and place in the fridge for 30min.


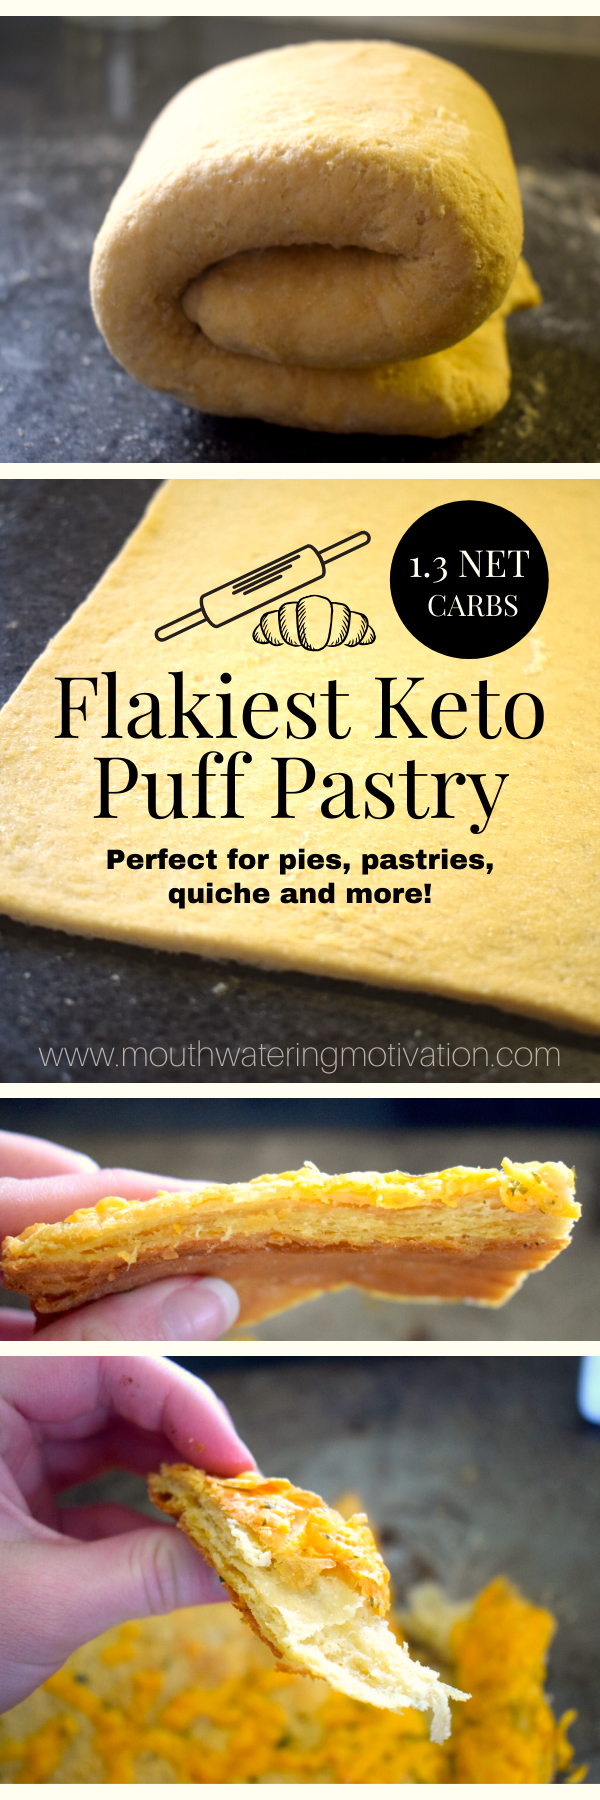
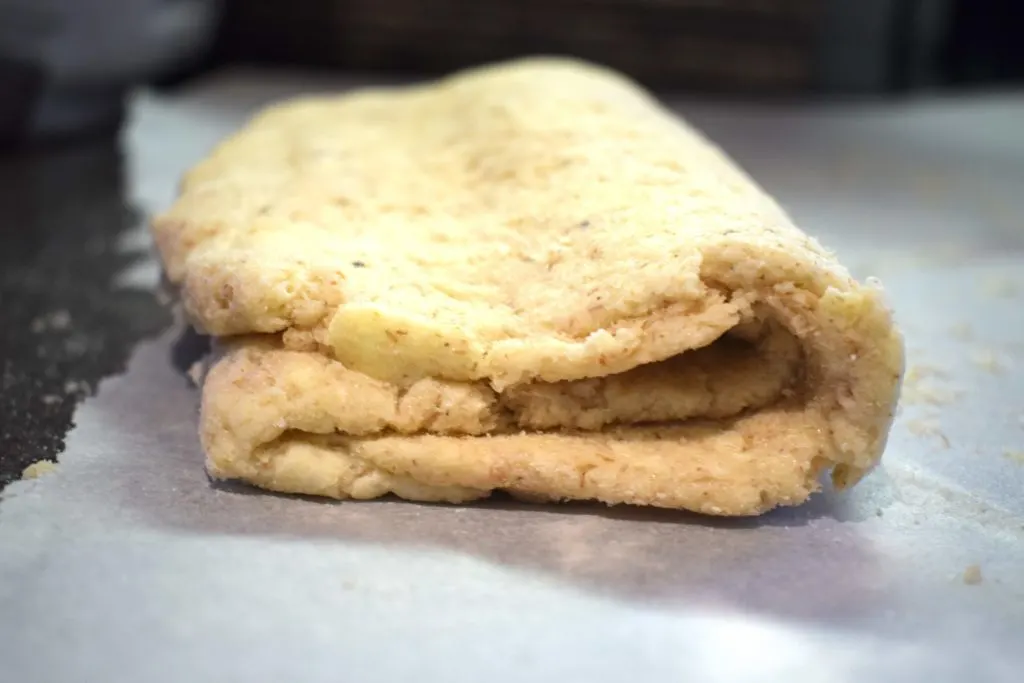
Vital Wheat Gluten Version Before Refrigeration

Gluten Free Version – After Kneading and Before Refrigeration
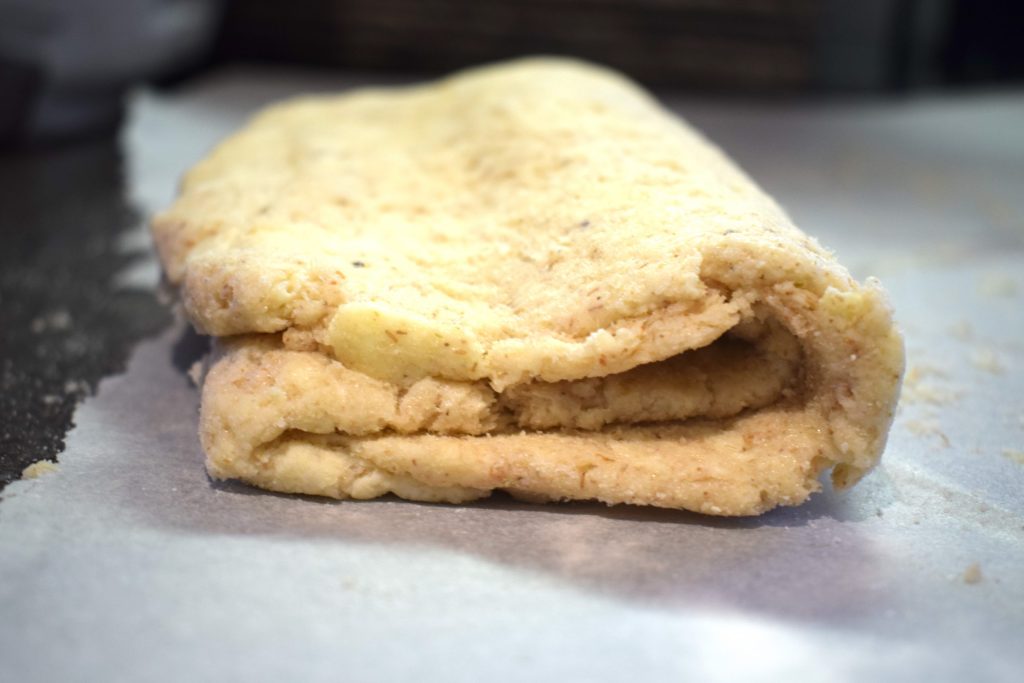
- Next unwrap your dough and roll it out flat between two sheets of parchment paper. (Flour your parchment and rolling pin lightly with coconut flour, repeat this whenever needed, alternatively for the vital wheat gluten version you can use that to flour your surface)

- Fold each side of the dough inward (see photo), then turn the dough 90* and roll it out flat, squishing down the folded layers you just made. Then once again, fold each side inwards, turn 90* and roll it out flat. You want to repeat this 4-5 times to ensure layers of butter are spread throughout the dough. It will start off very rough looking but don't worry about that! Just push the rough edges in a bit and continue repeating the process until it looks more uniform. ( If at any time your dough feels warm, place it back in the fridge or freezer for a bit to get cold again. You don't want your butter to melt).


- After you've rolled the dough out 4-5 times following step 7, fold it once more, Saran Wrap it and place it back in the fridge for another 30min.


Vital Wheat Gluten Pastry Dough
Gluten Free Pastry Dough
- Pre-heat your oven to 400*F.
- Roll the dough out and use as desired! (I typically cut my dough in half and put half back in the fridge to make it easier to roll out and work with when making individual items, use the other half of the dough once you've finished with the first).


- Brush the dough with an egg wash before baking (optional). Typically this dough takes 20-30min at 400*F but it may take less time if your oven runs on the hotter side or more time depending on what fillings you are adding. NOTE: the gluten free version will bake in closer to 20min while the vital wheat gluten version will take longer. This dough is a good size for a pie, individual pizza, 12 tartlets, 8 small filled pockets or for a side serving of cheesy bread. Double ingredients for a larger recipe. I actually used this pastry dough already for croissants, tartlets and cheesy bread myself so check those out first! Enjoy your Flaky Keto Puff Pastry.


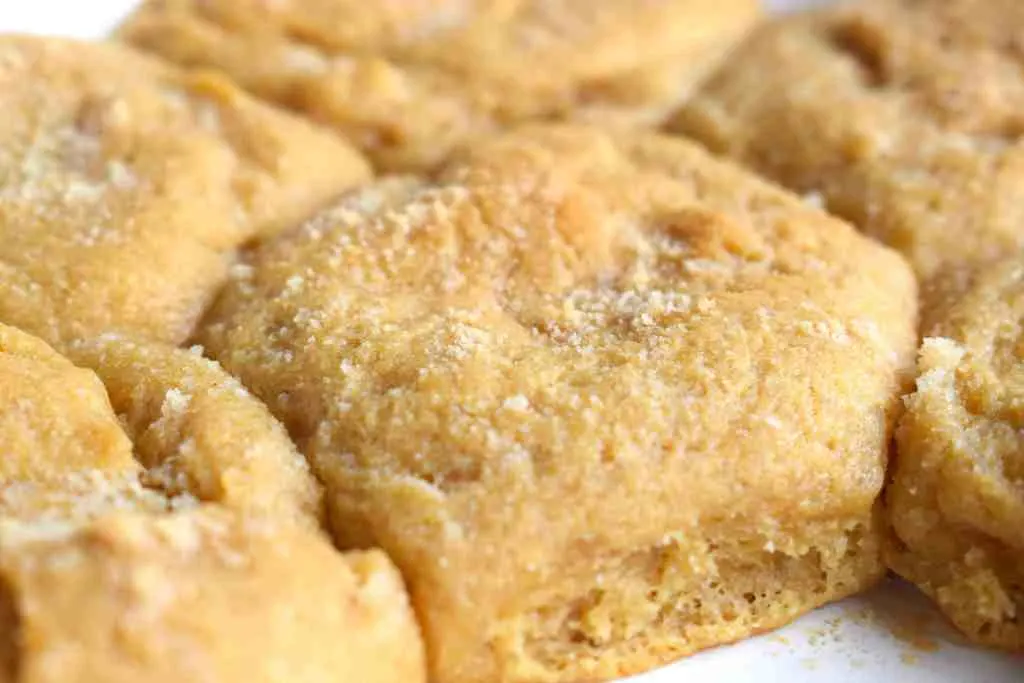
Gluten Free Puff Pastry Before Baking


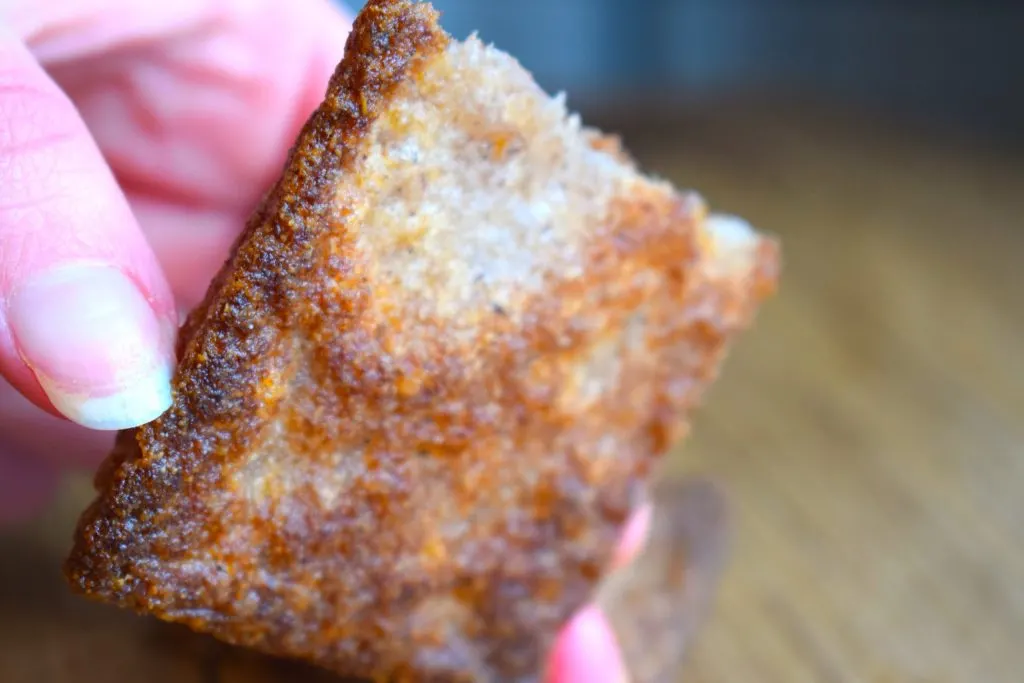
Gluten Free Puff Pastry After Baking
Vital Wheat Gluten Keto Puff Pastry


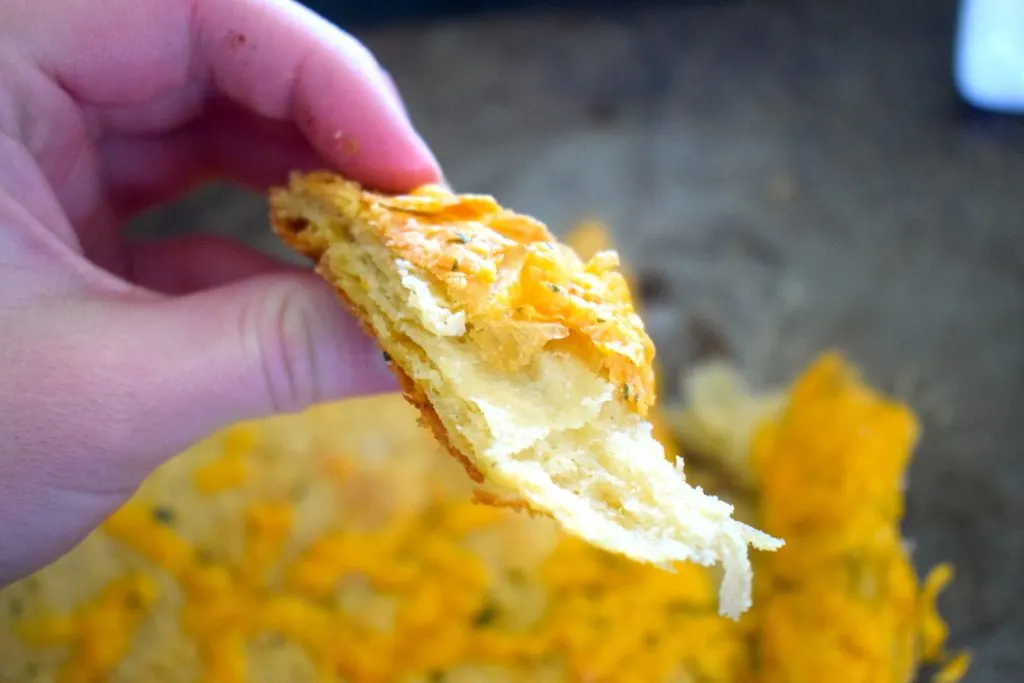
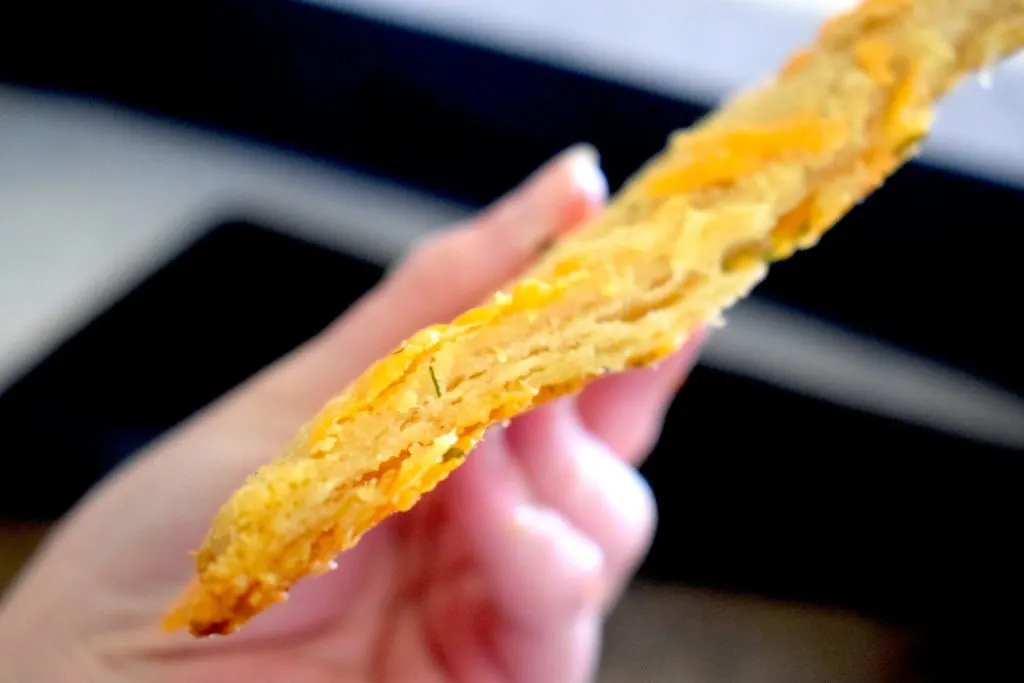
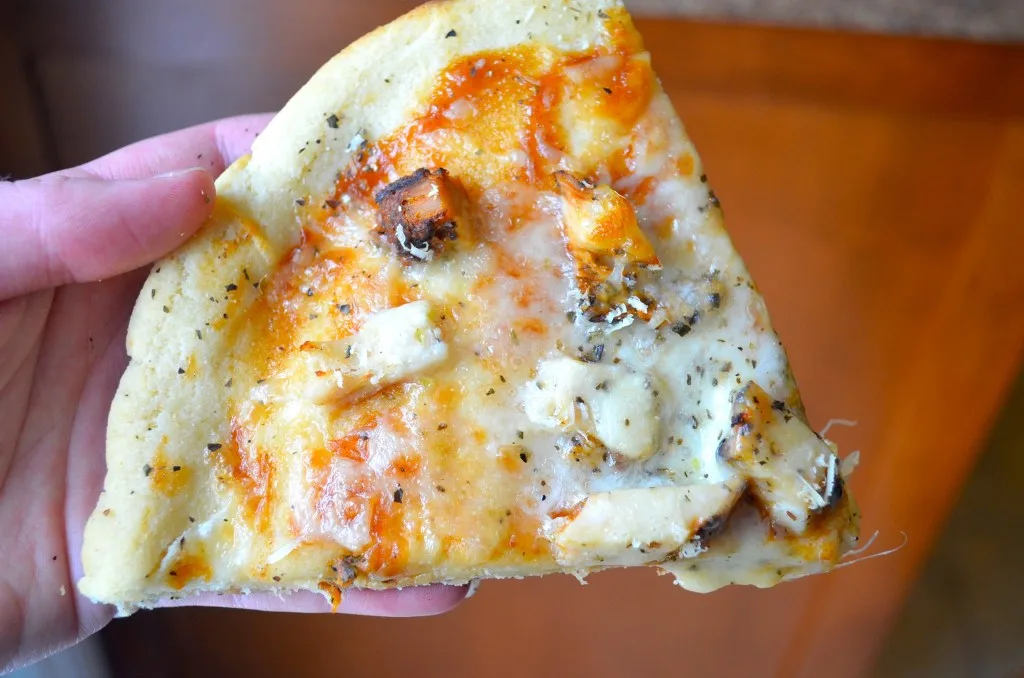
Vital Wheat Gluten Puff Pastry After Baking with Cheese
Nutrition For 1/8th of vital wheat gluten keto puff pastry dough: 153 calories | 1.3 NET carbohydrates | 14.6g fat | 5.6g protein | 4.1g fibre
Nutrition For 1/8th of gluten free keto puff pastry dough: 138 calories | 14.5g fat | 0.5 NET carbs | 1.3g protein
Disclaimer: This post contains some affiliate links


Flaky Keto Puff Pastry

Vital what gluten and a gluten free option
Vital Wheat Gluten Version
- 5 tbsp vital wheat gluten (50g)
- 1/4 cup almond flour (30g)
- 2 tbsp oat fiber (14g)
- 1 tbsp coconut flour (7g)
- 1/4 tsp baking powder
- 1/4 tsp xanthan gum
- 1/8 tsp salt
- 125 g butter cold
- 1/3 cup + 1 tbsp cold water
Gluten Free Version
- 5 tbsp psyllium husks (26g (You can also use ground, just me sure to match the amount in grams as you'll likely need less tablespoons))
- 1/4 cup almond flour (30g)
- 1 tbsp coconut flour (7g)
- 1/4 tsp baking powder
- 1 tsp Xanthan Gum
- 1/8 tsp salt
- 125 g butter cold
- 1/2 cup cold water
- 1 egg white
- Add your dry ingredients to a food processor and grind until everything is a fine powder (if you do not have a food processor you can definitely still make this recipe, your dough may just be a bit more textured)
- Next add in chunks of butter (roughly chopped, doesn't have to perfect) and pulse a few times until the butter chunks are a bit smaller and coated with flour but still visible. (again doesn't have to be perfect, if you don't have a food processor, just chop the chunks ~1/8th of an inch thick and and stir them into your dry ingredients).
- Dump this mixture into a bowl and add your cold water (and egg white if making the gluten free version). Mix with a spoon until a rough dough forms.
- *Skip this step if making the vital wheat gluten version – press the dough together and knead it a few times until it starts to stick together (you don't want the butter chunks blended in but you also want the dough to hold together without crumbling and have a smoother surface.
- Press the dough into a rough ball shape, wrap it in Saran Wrap and place in the fridge for 30min.
- Next unwrap your dough and roll it out flat between two sheets of parchment paper. (Flour your parchment and rolling pin lightly with coconut flour, repeat this whenever needed, alternatively for the vital wheat gluten version you can use that to flour your surface)
- Fold each side of the dough inward (see photo), then turn the dough 90* and roll it out flat, squishing down the folded layers you just made. Then once again, fold each side inwards, turn 90* and roll it out flat. You want to repeat this 4-5 times to ensure layers of butter are spread throughout the dough. It will start off very rough looking but don't worry about that! Just push the rough edges in a bit and continue repeating the process until it looks more uniform. ( If at any time your dough feels warm, place it back in the fridge or freezer for a bit to get cold again. You don't want your butter to melt).
- After you've rolled the dough out 4-5 times following step 7, fold it once more, Saran Wrap it and place it back in the fridge for another 30min.
- Pre-heat your oven to 400*F.
- Roll the dough out and use as desired! (I typically cut my dough in half and put half back in the fridge to make it easier to roll out and work with when making individual items, use the other half of the dough once you've finished with the first).
- Brush the dough with an egg wash before baking (optional). Typically this dough takes 20-30min at 400*F but it may take less time if your oven runs on the hotter side or more time depending on what fillings you are adding. NOTE: the gluten free version will bake in closer to 20min while the vital wheat gluten version will take longer. This dough is a good size for a pie, individual pizza, 12 tartlets, 8 small filled pockets or for a side serving of cheesy bread. Double ingredients for a larger recipe. I actually used this pastry dough already for croissants, tartlets and cheesy bread myself so check those out! Enjoy your Flaky Keto Puff Pastry.
*New* Get Your Customized Keto Diet Plan For 1$
The nutritional information listed below is for 1/8th of the vital wheat gluten version.
The nutrition for 1/8th of the gluten free version is: 138 calories | 14.5g fat | 0.5 NET carbs | 1.3g protein


Other Similar Recipes You May Like:

Keto Cheese Buns

Soft Keto Yeast Risen Buns

The Best Keto Croissants

The Greatest Low-Carb Pizza of All Time (YEAST RISEN)


Keto Pizza Bites
[sg_popup id=14817]
Sarie
Thursday 6th of November 2025
I cant find part fibre where I live, can I substitute it. I do hame viral gluten powder
Mariah
Thursday 28th of August 2025
Hi there! Is it possible to pre-make the dough and store it for a day or two prior to making the final dish?
پفک در رژیم کتوژنیک: آیا پفکهای معمولی برای رژیم کتو مناسبند؟ - سلامت ایران
Wednesday 12th of March 2025
[…] منبع: https://mouthwateringmotivation.com/2020/05/16/flaky-keto-puff-pastry/ […]
Carb Crunch: Crunching the Numbers on Carbs in Puff Pastry - Foober Meal Delivery
Saturday 7th of December 2024
[…] 153 kcal (Mouthwatering Motivation) […]
BrianG
Thursday 22nd of February 2024
This recipe is very exciting! I am eager to try it. I am male almost 60 and have been dabbling in keto/low carb and intermittent fasting for a couple of years and have lost 50 pounds. I am trying to eat more low carb but my wife resists because she can’t get over the foods she loves (which are all high carb and bad for her). So I searched keto puff pastry and found you! And your recipes and information looks like just what I need to make some baked goods that my wife might just eat. I made a loaf of keto yeast bread yesterday and it turned out great but the flax seed meal is just too strong for her. I am hoping I can sub in lupin flour to solve that. I’m going to try anyway. I’ll let you know how things go. Thanks for sharing your knowledge. 👍🏻