


Have you been missing traditional pizza on keto? SAME. It's one of those things I've struggled with because I absolutely LOVE, LOVE PIZZA. I'd like to think more than the average person but there are a lot of pizza connoisseurs out there.
Now because of this love, I've made it my mission to make “real” pizza on keto. What do I mean by that?
Keto Pizza Crust MADE WITH YEAST! That's right.
Disclaimer: This post contains some affiliate links. If you choose to purchase an item through one of these links, I may receive a small commission. This does NOT affect your purchase in any way. 

As much as I adore my “Best Keto Pizza Crust Recipe” and think it tastes delicious. I still had that nagging feeling that it wasn't the pizza I know and love. I think if you are a thin crust person, you will still really enjoy my first keto pizza recipe…
But me being a thick crust, all the bread, all the dough kind of person, I knew I needed to try again with yeast.
You may have come across my first yeast bread attempt years ago called the “The Best Low Carb Pizza Crust” or “The Greatest Low Carb Pizza Crust Ever“.
Now when I called it the best low carb pizza crust, at the time, I wasn't lying. I was SO happy with how it came out. It was the first keto pizza crust where the low carb pizza dough rose properly and it came out looking more like real pizza!
But people still found some problems with that keto pizza dough and it was a bit finicky. Some people had great success, others found it soggy.. and in the comment section over the years, I've learned the problem isn't quite the flavour but rather how the dough cooks. It needs to brown more and cook through before the toppings cook.
This is why, in this low carb pizza recipe, we are using higher protein ingredients that are less high in fat (I know, total opposite of keto but hear me out) they are still low in carbs but are more likely to cause browning in the oven and due to how “light” they are compared to almond and coconut flour, they allow for a better rise with your pizza dough.


I also had some commenters mention using a pizza stone or a cast iron skillet for their pizza and after years of not bothering with..
I figured I'd give it a shot. I invested in a cast iron skillet and boy did my life just change. If you don't have one..I think it's well worth the price for what it does.
The skillet helps to cook the keto pizza crust from the BOTTOM up rather than top down to crisp the crust before the top of the pizza and the toppings themselves become too brown. This is essential for keto pizza doughs as they tend to remain softer and chewier than traditional pizza dough!
You only need to heat to pizza for a few minutes in the skillet to make a difference!
Since this crust is also made from very high fibre and high protein ingredients, you'll find it's VERY filling. A couple slices will leave you feeling full for hours afterwards.
Now I do want to talk a bit about Vital Wheat gluten. I constantly get asked if it's keto, what it is, where to buy it, etc. So I've written an entire article on it you can see here to learn more.
In summary, vital wheat gluten is the protein found in wheat. It's what creates gluten strands and provides the soft but chewy texture in bread and baked goods. Vital wheat gluten is extracted and separated from the wheat so on it's own, it's only a protein with minimal carbs attached to it. It's perfectly fine on a keto diet if you track the NET carbs in this recipe like anything else but the only people who absolutely should NOT consume it is those with a gluten allergy or who are celiac.
If you are gluten-intolerant or celiac I highly recommend you check out The Best Keto Pizza Crust. It's not yeast risen but the flavour is AMAZING!
Alright, alright…now back to this recipe.. 

Ingredients In This Keto Pizza Crust With Yeast
- As I mentioned above, Vital Wheat Gluten is necessary for this recipe and cannot be replaced. See this article if you'd like to learn more about it. If you cannot have gluten then definitely try my “Best Keto Pizza Crust Recipe” instead!
- Flax meal and Oat fiber. These two ingredients provide a heartiness to the crust as they are high in fibre. They provide flavour and bulk without adding many carbs. You can try subbing flax meal with ground psyllium husks (you may not need quite as much) but I can't completely vouch for the results as I haven't tried this substitution in this specific recipe just yet.
- Xanthan gum, a great way to improve elasticity in gluten-free baked goods. It's used alongside vital wheat gluten to provide the best possible “crust-like” texture by giving a “chew” to the dough. If you do not have this ingredient you can still go ahead with this recipe but I'd recommend it if you can get your hands on it.
- Active Dry Yeast, essential to get our bread to rise and create that real crust-like texture! *Freeze your yeast in a sealed container or inside 2 ziplock bags to keep in fresh longer!
- SUGAR. Yes there is a little bit of sugar in this recipe BUT it IS NECESSARY for this bread to work. Do not leave it out. The yeast will consume it and it will not affect the nutrition of the final product.
- Mozzarella – Try not to use fresh mozzarella, and even avoid pre-shredded if you can. Try to use block mozzarella or another mozzarella with lower moisture content. If you absolutely can only find fresh mozzarella then just add a tiny bit less water to your dough to adjust for the added moisture.
- Parmesan – I used fresh grated parmesan for the best possible flavour but I believe dried parmesan should work as well.


Tools I Used To Make The Best Keto Pizza Crust With Yeast
- Low Carb Substitution Guide – This is totally optional but if you like my recipes, I now have a $5 guide available with all of the substitutions I use to create every recipe on my site. You can use this to convert old traditional recipes and create new keto recipes! You can purchase it here and/or read more if you are interested. 🙂 I appreciate your support so much guys!
- Nutritional Food Scale – AKA my best friend. This little buddy has been with me for over 4 years and never fails. Perfect measurements and only needs the batteries replaced maybe once a year!
- Pizza Cutter
- KitchenAid Stand Mixer (With Dough Hook Attachment)
- Cast Iron Skillet or Pizza Stone
- Mixing Bowls


Tips For Making Keto Pizza Crust With Yeast
- The reason we add the salt to this dough later on is that it can actually interfere with the yeast's formation process and the enzymes in flour, as well as how the water affects gluten development.
- To tell if dough has been kneaded enough, if you lift it, does it holds it's shape relatively well in you hands? Does it feel different? As in, more elastic as you knead it and came more easily form a smoother ball? Then it's kneaded enough! If you are concerned, just know that about 5min at 3-4 speed on most stand mixers is plenty of time for gluten to form. 10 min by hand and still concerned? Knead a bit more than go ahead and let it rise. It's tough to over-knead this dough by hand.
- Want the best-tasting version of this dough? Let it rise for 30-40min at room temperature or until about 1.5x it's original size, then place in the fridge overnight to finish rising. Remove 1 hour prior to the time you plan to bake it, pre-heat your oven to 425*F then follow the instructions below for shaping and baking!
- PRO TIP: Use a 12-inch cast iron skillet for this recipe (or you can use a pizza stone if you own one). Add ~2 tbsp olive oil prior to placing your crust into the skillet. Make sure to brush it around the pan. Then after placing down the dough with slightly folded edges for the crust, top it, then heat the dough and your toppings for ~3-4min or JUST until the pan starts to sizzle (If you cook it too long, you can run the risk of burning the center of the crust). Then transfer the skillet to the oven for another 10-14min to finish cooking the pizza!
- Try not to use too many high moisture toppings for a crispier crust.
- For thin crust pizza bake at 450*F for thicker crust, bake at 400-425*F to help it cook through (thicker crusts benefit immensely from a pizza stone or cast iron skillet if you have one).


How To Store Keto Pizza Crust with Yeast
- Store leftover pizza as you would traditional pizza in the fridge. Re-heat in the oven at 350-400*F until warm. You can also freeze the prepared and cooked pizza.
- Another option is to freeze the dough. Since this recipe makes enough dough for two medium pizzas, you can save one half of the dough for later by rolling it into a ball, wrapping in saran wrap and placing in a ziplock bag in the freezer until you plan to use it next. Remove it to thaw in the fridge the night before you plan to cook it and then let it come to room temperature before rolling it out!


Other Pizza Recipes I've Made:
- Low Carb Keto Pizza Bites
- The Best Low Carb Pizza Crust
- The Best Keto Pizza Crust
- Keto Pizza Pockets
- Keto Deep Dish Pizza
Keto Pizza Crust With Yeast
Serves: 2 medium Pizzas (6 slices per pizza)
Ingredients:
- 1 cup vital wheat gluten 154g
- 1/2 cup oat fiber 96g
- 2/3 cup ground flax meal 70g
- 2 tbsp powdered monkfruit/erythritol sweetener, 20g
- 1 pkt. or 1 tbsp active dry yeast, 14g
- 1 tbsp Italian or pizza seasoning
- 1 tsp garlic powder
- 1 tsp sugar (necessary for the yeast, will not affect the final nutrition facts of the dough!)
- 1/2 tsp baking powder
- 1/2 tsp xanthan gum
- 1 tsp salt
- 2 tbsp olive oil
- 2 eggs room temperature
- 1/4 cup grated fresh parmesan cheese, 30g
- 1/4 cup shredded mozzarella, 30g
- 1 cup warm water
Directions:
- Pre-heat your oven to the lowest setting then shut it off once it comes to temperature.
- Meanwhile, in a large bowl combine all of the dry ingredients including; vital wheat gluten, oat fiber, ground flax meal, powdered monkfruit/erythritol sweetener, yeast, italian seasoning, garlic powder, sugar, baking powder and xanthan gum. Do not add the salt just yet (see above in the tips as to why).


- Whisk your eggs very well in a separate bowl with the two cheeses and salt.


- Add your warm water and oil to the dry ingredients and stir a few times. Then also add the cheese and egg mixture.


- Mix well until a dough begins to form. At this point I put my dough in my KitchenAid mixer with the dough hook attachment on the setting 3 or 4 and let it run for ~5-8min.


- OR if you do not have a mixer, you will have to knead the dough for ~ 10min or more by hand. You can tell when the dough has been kneaded enough when it has some more elasticity to it and holds it's shape better. It will also be easier to form into a somewhat smooth ball.


- Speaking of that, form your dough into a rough ball and place it into a greased bowl, covered with Saran Wrap or a towel. Place this inside your previously warmed oven with the door ajar (or some place warm but not hot) to rise for ~1 hour (OR 30-40min then place in the refrigerator over-night and bake the next day for the best flavour!)


- Pre-heat your oven to 425*F prior to baking.
- After the 1 hour in a warm place (or 30-40min in a warm place and then in your fridge overnight) your dough should have pretty much doubled in size.
- Break it into 2 halves. Save one half for another time (see storage instructions above) place the half you are using between two greased sheets of parchment paper. Roll it out using a rolling pin until it's slightly bigger than the pan you are using. Pinch the edges over to form a crust.


- Then place onto a parchment-lined and olive oil-greased pan or baking sheet (brush olive oil over the parchment paper). **ALSO SEE MY PRO TIP FOR GETTING A CRISPIER PIZZA CRUST ABOVE, I FOLLOWED THIS METHOD INSTEAD.**


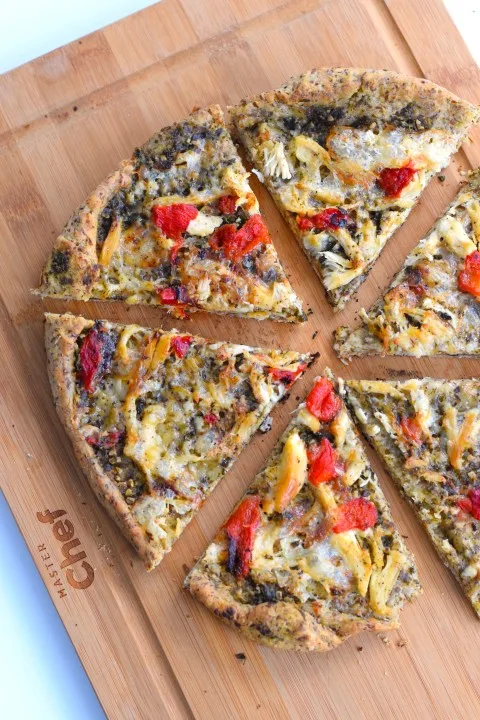
- Top the pizza dough with whichever pizza toppings you prefer (be sure not to over-do high moisture toppings for a crispier crust). I used pesto, brie, cooked rotisserie chicken and some roasted red peppers.


- Bake the pizza crust for 10-14min or until the cheese is melted and the crust is browned.


- Cool for a couple minutes, then you can top with fresh basil or chili flakes, then slice and serve! Enjoy the BEST Keto Pizza Crust Made With Yeast!


Nutrition for 1/6th of medium pizza CRUST ONLY (~2 slices): 262 calories | 13.3g fat | 5.5g NET carbs | 26.9g protein | 18.5g fiber


Keto Pizza Crust With Yeast

- 1 cup vital wheat gluten (154)
- 1/2 cup oat fiber (96g)
- 2/3 cup ground flax meal (70g)
- 2 tbsp powdered monkfruit/erythritol sweetener (20g)
- 1 pkt. or 1 tbsp active dry yeast (14g)
- 1 tbsp Italian or pizza seasoning
- 1 tsp garlic powder
- 1 tsp sugar (necessary for the yeast, will not affect the final nutrition facts of the dough!)
- 1/2 tsp baking powder
- 1/2 tsp xanthan gum
- 1 tsp salt
- 2 tbsp olive oil
- 2 eggs room temperature
- 1/4 cup grated fresh parmesan cheese (30g)
- 1/4 cup shredded mozzarella (30g)
- 1 cup warm water
- 1-2 tbsp olive oil (for greasing your cast iron skillet or pan)
- Pre-heat your oven to the lowest setting then shut it off once it comes to temperature.
- Meanwhile, in a large bowl combine all of the dry ingredients including; vital wheat gluten, oat fiber, ground flax meal, powdered monkfruit/erythritol sweetener, yeast, italian seasoning, garlic powder, sugar, baking powder and xanthan gum. Do not add the salt just yet (see above in the tips as to why).
- Whisk your eggs very well in a separate bowl with the two cheeses and salt.
- Add your warm water and oil to the dry ingredients and stir a few times. Then also add the cheese and egg mixture.
- Mix well until a dough begins to form. At this point I put my dough in my KitchenAid mixer with the dough hook attachment on the setting 3 or 4 and let it run for ~5-8min.
- OR if you do not have a mixer, you will have to knead the dough for ~ 10min or more by hand. You can tell when the dough has been kneaded enough when it has some more elasticity to it and holds it's shape better. It will also be easier to form into a somewhat smooth ball.
- Speaking of that, form your dough into a rough ball and place it into a greased bowl, covered with Saran Wrap or a towel. Place this inside your previously warmed oven with the door ajar (or some place warm but not hot) to rise for ~1 hour (OR 30-40min then place in the refrigerator over-night and bake the next day for the best flavour!)
- Pre-heat your oven to 425*F prior to baking.
-
After the 1 hour in a warm place (or 30-40min in a warm place and then in your fridge overnight) your dough should have pretty much doubled in size.
-
Break it into 2 halves. Save one have for another time (see storage instructions above) place the half you are using between two greased sheets of parchment paper. Roll it out using a rolling pin until it's slightly bigger than the pan you are using. Pinch the edges over to form a crust.
-
Then place onto a parchment-lined and olive oil-greased pan or baking sheet (brush olive oil over the parchment paper). **ALSO SEE MY PRO TIP FOR GETTING A CRISPIER PIZZA CRUST ABOVE. I FOLLOWED THIS METHOD INSTEAD**
- Top the pizza dough with whichever pizza toppings you prefer (be sure not to over-do high moisture toppings for a crispier crust). I used pesto, brie, cooked rotisserie chicken and some roasted red peppers.
- Bake the pizza crust for 10-14min or until the cheese is melted and the crust is browned.
- Cool for a couple minutes, then you can top with fresh basil or chili flakes, then slice and serve! Enjoy the BEST Keto Pizza Crust Made With Yeast!
Ingredients Links
Tips For Making Keto Pizza Crust With Yeast
- The reason we add the salt to this dough later on is that it can actually interfere with the yeast's formation process and the enzymes in flour, as well as how the water affects gluten development.
- To tell if dough has been kneaded enough, if you lift it, does it holds it's shape relatively well in you hands? Does it feel different? As in, more elastic as you knead it and came more easily form a smoother ball? Then it's kneaded enough! If you are concerned, just know that about 5min at 3-4 speed on most stand mixers is plenty of time for gluten to form. 10 min by hand and still concerned? Knead a bit more than go ahead and let it rise. It's tough to over-knead this dough by hand.
- Want the best-tasting version of this dough? Let it rise for 30-40min at room temperature or until about 1.5x it's original size, then place in the fridge overnight to finish rising. Remove 1 hour prior to the time you plan to bake it, pre-heat your oven to 425*F then follow the instructions below for shaping and baking!
- PRO TIP: Use a 12-inch cast iron skillet for this recipe (or you can use a pizza stone if you own one). Add ~2 tbsp olive oil prior to placing your crust into the skillet. Make sure to brush it around the pan. Then after placing down the dough with slightly folded edges for the crust, top it, then heat the dough and your toppings for ~3-4min or JUST until the pan starts to sizzle (If you cook it too long, you can run the risk of burning the center of the crust). Then transfer the skillet to the oven for another 10-14min to finish cooking the pizza!
- Try not to use too many high moisture toppings for a crispier crust.
- For thin crust pizza bake at 450*F for thicker crust, bake at 400-425*F to help it cook through (thicker crusts benefit immensely from a pizza stone or cast iron skillet if you have one).
- Store leftover pizza as you would traditional pizza in the fridge. Re-heat in the oven at 350-400*F until warm. You can also freeze the prepared and cooked pizza.
- Another option is to freeze the dough. Since this recipe makes enough dough for two medium pizzas, you can save one half of the dough for later by rolling it into a ball, wrapping in saran wrap and placing in a ziplock bag in the freezer until you plan to use it next. Remove it to thaw in the fridge the night before you plan to cook it and then let it come to room temperature before rolling it out!


Other Similar Recipes You May Like:


The Best Low Carb Pizza Crust
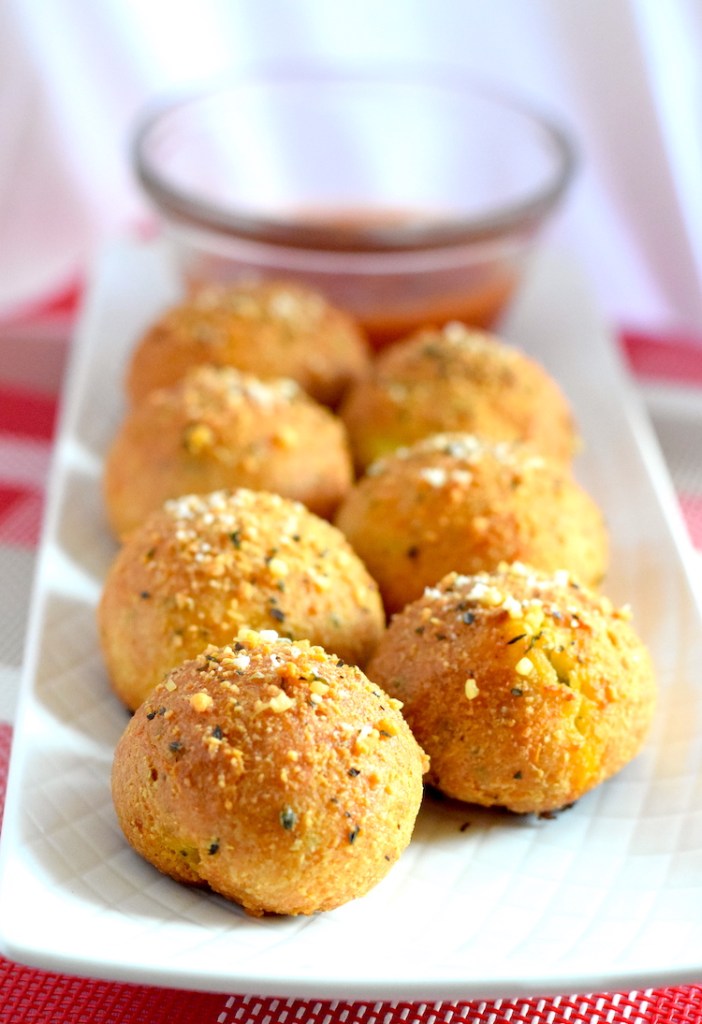

Keto Pizza Bites

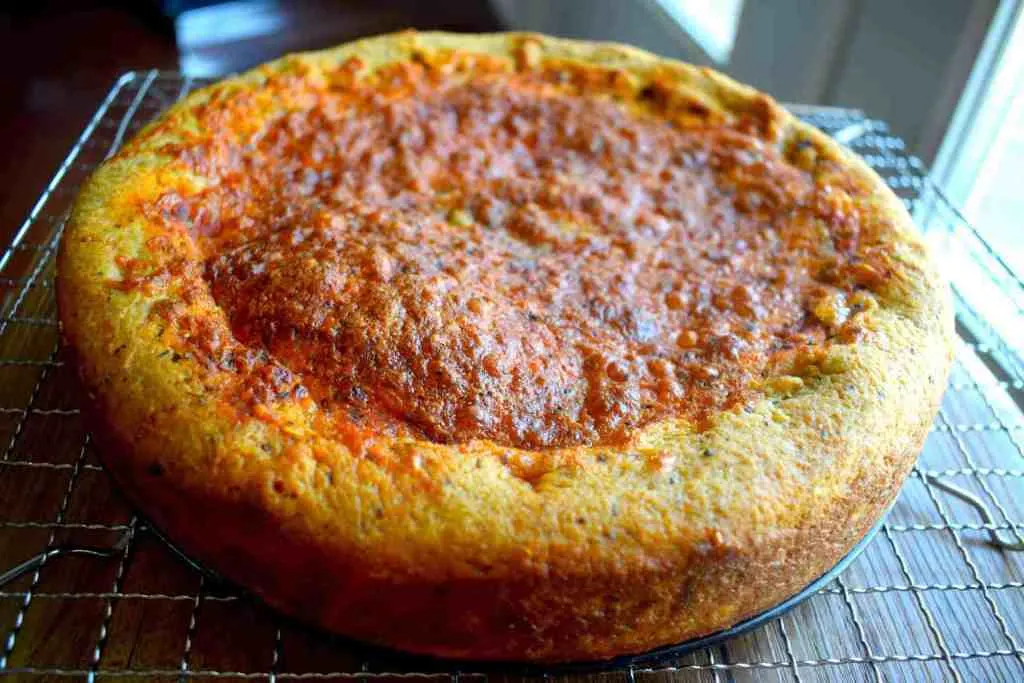
Keto Deep Dish Pizza

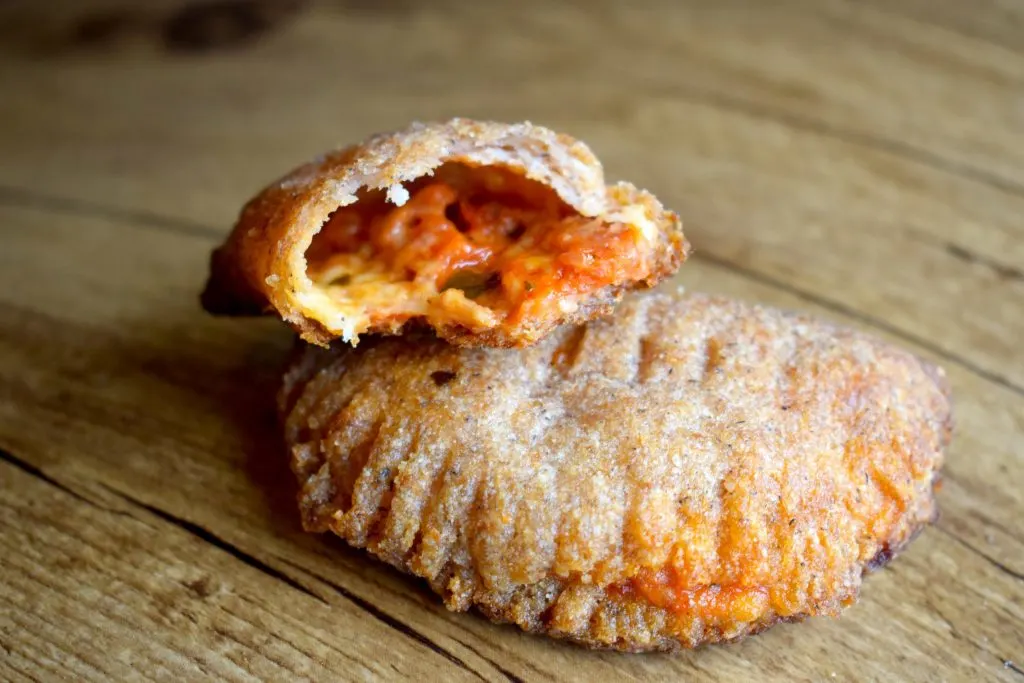
Keto Pizza Pockets


The Best Keto Pizza Crust
Sheryl
Wednesday 11th of May 2022
I made this recipe yesterday and it was very easy. It's a stronger flavor than I expected but overall we enjoyed it. I also took the other half and made a mini baguette with it. So cute! I sliced it thinly and have it toasting in the oven on low to use with dip/spread.
Lynne
Wednesday 2nd of February 2022
Best pizza base I have ever made. One batch was enough for a large pizza and 16 pizza scrolls that will be put into the freezer for lunches on weekends. Could only eat 2 slices. We will definitely be making this again.
Ines
Friday 11th of June 2021
Is your nutrition count based on 1/6 of 1 (out of 2) crusts? Or 2/6 of the 1(out of 2) crusts?
sammysamgurl
Friday 11th of June 2021
Sorry about that! I think it should have said 1/3 (about 2 slices) of a medium pizza. This is the nutrition facts for a pizza crust made with HALF the total dough the recipe makes. So if you follow the recipe and break the dough in half and place the other half in your freezer for another time, this is the nutrition facts for 1/3 (2 slices) of 1 medium pizza (made with 1/2 the dough).